Photography tutorials and resources can be found in a variety of places online. Websites like Digital Photography School, Photojojo, DIY Photography, and PetaPixel offer a wealth of tutorials, tips, and tricks to help photographers of all levels improve their skills. YouTube is also a great resource for photography tutorials. Many photographers have created helpful video tutorials covering topics from beginner basics to advanced techniques. Books are also a great way to learn more about photography. A quick search for photography books on Amazon or Barnes & Noble will yield hundreds of options. Finally, many local camera stores and photography schools offer classes and workshops to help photographers learn more about the art and craft of photography.
Here are some best of Photography tutorials and resources:
1. Equipment Photography Tutorials:
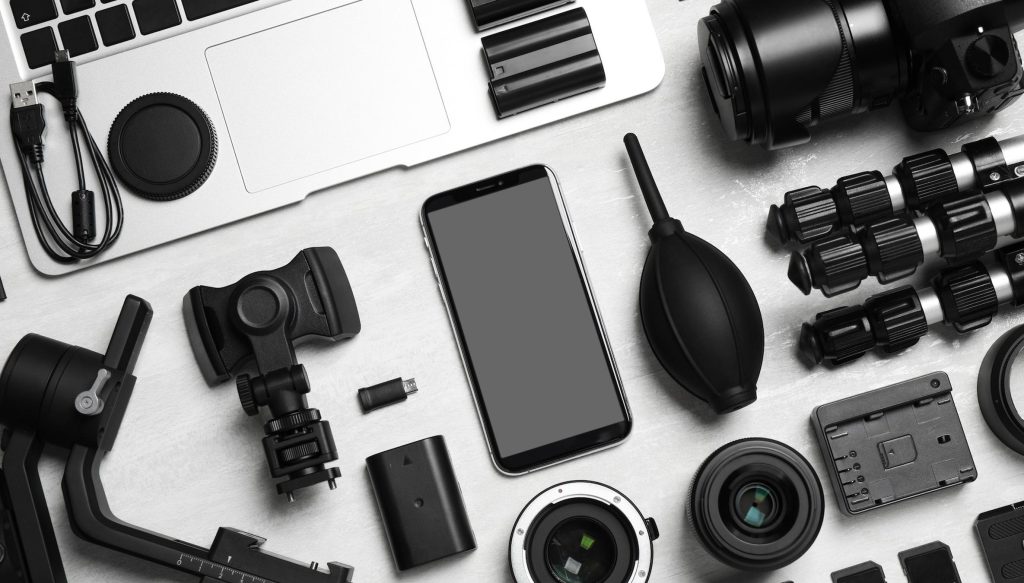
Tutorials and resources that teach how to use and operate photographic equipment, such as cameras, lenses, lighting, and other accessories.
1. Start With the Basics: Get to know your camera and understand its basic settings and functions. Learn the fundamentals of photography and the different types of photography equipment.
2. Choose the Right Equipment: Understand the different types of photography equipment and what they are used for. Learn how to select the right tools for the job.
3. Master Lighting: Learn how to use natural light and artificial light to bring out the best in your subject. Understand the basics of lighting and how to use it to create the desired effect.
4. Use the Right Settings: Get to know the settings on your camera and how to use them to achieve the desired effect. Learn how to adjust shutter speed, aperture, and ISO for the best results.
5. Know Your Camera: Take the time to get to know your camera inside and out. Learn how to use its various features and settings to create the desired effect.
6. Shoot in RAW: Learn how to shoot in RAW, and why it is important to do so in certain situations. Understand the workflow of shooting in RAW and how it can bring out the best in your images.
7. Invest in Quality: Understand the importance of investing in quality photography equipment. Learn how to care for and maintain your equipment.
8. Understanding Composition: Learn the basics of composition and how to use it to create the desired effect. Understand how to use the rule of thirds and how to create dynamic images.
9. Post-Processing Tips: Learn how to edit your photos and make them look their best. Understand the basics of photo editing and how to use post-processing software.
10. Get Creative: Experiment with different techniques and try new ideas. Push your creativity and learn new skills to help you take your photography to the next level.
2. Composition Photography Tutorials:
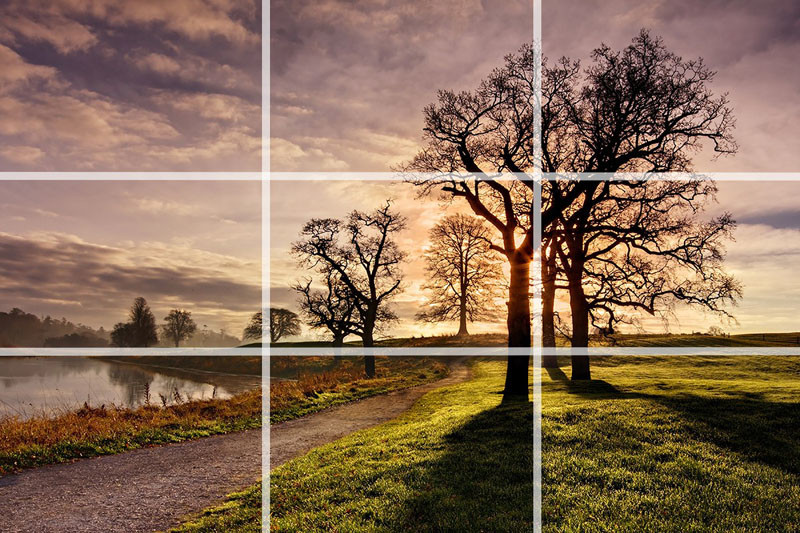
Tutorials and resources that help photographers learn about the fundamentals of composition and how to apply them to create well-balanced images.
1. Master the Basics of Composition: Start by mastering the basics of composition. Learn about the rule of thirds, leading lines, and other composition techniques.
2. Understand Light: Study the effects of different types of light and how it affects composition. Learn about how natural light, artificial light, and shadows can be used to create interesting compositions.
3. Practice Framing: Practice framing your subject with different elements in the frame. Learn how to create a sense of depth by playing with foreground and background elements.
4. Use Storytelling Techniques: Learn how to tell a story through your composition. Look for ways to add context to your images and draw the viewer in.
5. Experiment with Different Angles: Try different angles to capture an interesting composition. Learn how different angles can create a different mood or emotion.
6. Use Color and Contrast to Your Advantage: Explore how colour and contrast play into the composition. Learn how to use colour to create a sense of balance and contrast to draw the viewer in.
7. Utilize Negative Space: Learn how to use negative space to your advantage. Understand how negative space can be used to frame a subject or create a sense of balance.
8. Practice Perspective: Try out different perspectives to create a unique composition. Understand how wide-angle, telephoto, and other lenses can affect your composition.
9. Capture the Moment: Learn how to capture the moment in a composition. Look for the decisive moment when everything comes together for the perfect shot.
10. Find Inspiration: Find inspiration through the work of other photographers and artists. Look at different styles of composition and find what works for you.
3. Post-Processing Photography Tutorials:
Tutorials and resources that teach how to edit and enhance digital images using photo editing software such as Adobe Photoshop, Lightroom, and more.
1. The Basics of Color Correction in Photoshop: Learn how to adjust the brightness, contrast, and colour balance of your images for a more professional look.
2. Advanced Photo Editing Techniques in Photoshop: Learn how to use masks and layers, clone and heal tools, and other advanced techniques to take your photos to the next level.
3. HDR Photography Basics: Learn the basics of HDR photography and how to use it to create stunning images.
4. Creating Matte Effects in Photoshop: Learn how to use blending modes and adjustment layers to create unique and interesting effects in your photographs.
5. Photo Retouching Basics: Learn the basics of retouching photos, including spot healing, blemish removal, and skin smoothing.
6. Creating Selective Color Effects in Photoshop: Learn how to use hue and saturation control to create vibrant and eye-catching images.
7. Using Filters and Effects to Enhance Your Photos: Learn how to use filters and effects to add depth and interest to your photos.
8. Adding Textures and Effects to Your Photos: Learn how to use textures and effects to add atmosphere and depth to your photos.
9. Advanced Compositing Techniques: Learn how to combine multiple images together to create a stunning composite.
10. Using Lighting and Filters to Enhance Your Photos: Learn how to use lighting and filters to add drama and atmosphere to your photos.
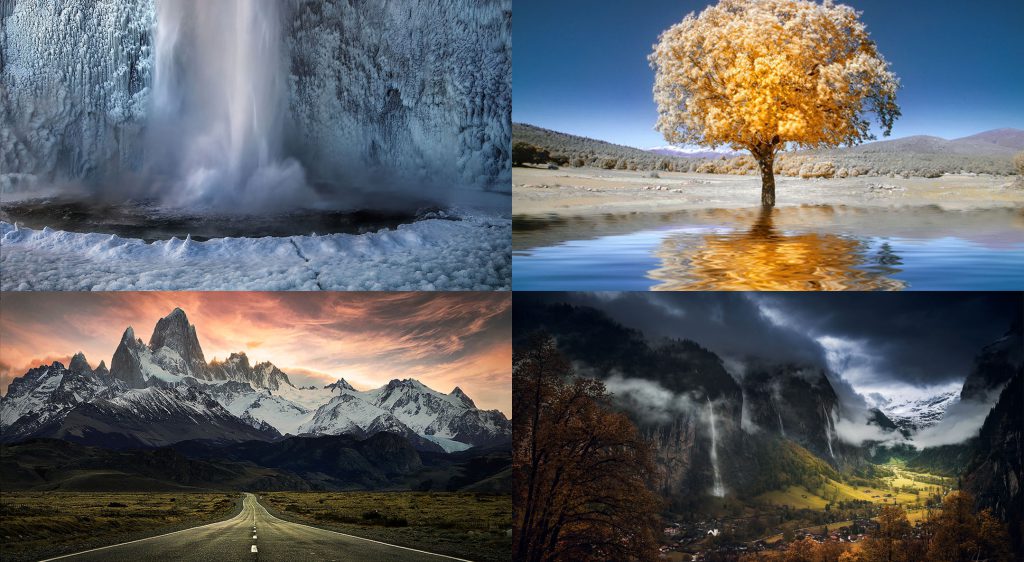
4. Landscape Photography Tutorials:

Tutorials and resources that teach how to capture stunning landscapes with cameras and lenses.
1. Choosing a Landscape Photography Location: When choosing a landscape photography location, it is important to consider the type of landscape you’re photographing. Are you looking for a mountain range, a beach, a cityscape, or a rural landscape? Each type of landscape will require different types of lenses, filters, and lighting. Additionally, you should also consider the weather conditions and the time of day you plan on shooting.
2. Understanding the Fundamentals of Camera Settings: Before you start shooting, it is important that you understand the fundamentals of camera settings. This includes shutter speed, aperture, ISO, white balance, and focal length. Each of these settings will affect the look and feel of your photographs.
3. Composition and Framing: Composition and framing are essential for capturing stunning landscape photographs. When composing your shot, consider the foreground, middle ground, and background. Additionally, pay attention to leading lines, symmetry, and contrast.
4. Capturing Movement: Capturing movement in your landscape photographs can be challenging but rewarding. This can be done with a slow shutter speed, a neutral density filter, and a tripod.
5. Post-Processing: Post-processing is a crucial part of landscape photography. It allows you to adjust the exposure, white balance, sharpness, and colour to create a stunning image. Popular post-processing software includes Adobe Lightroom and Photoshop.
6. Creating Panoramas: Creating panoramas is a great way to capture a wide-angle view of a landscape. You can do this with a panoramic head and stitch multiple photos together in post-processing.
7. Taking Night Shots: Taking night shots of landscapes can be difficult but rewarding. It requires long exposures, a sturdy tripod, and the right camera settings. Additionally, it’s important to use a remote shutter release to minimize camera shake.
5. Portrait Photography Tutorials:
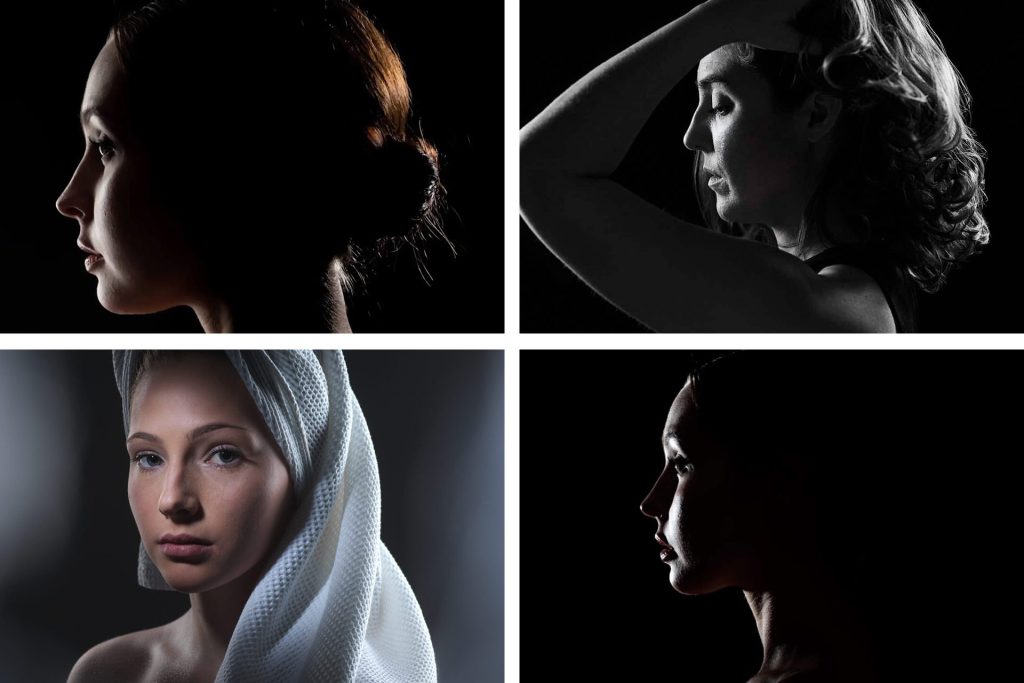
Tutorials and resources that teach how to take flattering portraits of people with the right lighting and posing techniques.
1. Lighting: The most important aspect of portrait photography is lighting. The positioning of the lights and their intensity will determine the look and feel of the photos. Different lighting setups can be used to achieve different looks, such as soft and diffused light for a romantic look, or hard and contrasty light for a dramatic look.
2. Background: The background of a portrait can have a major impact on the feel of the photo, so it’s important to choose a background that will complement the subject. Neutral backgrounds, such as a white wall or a studio backdrop, can work well for many types of portraits, while more creative backgrounds can help to create a unique and interesting look.
3. Posing: Knowing how to position and pose the subject can make a big difference in the quality of the photos. Different poses can help to accentuate the features of the subject, while at the same time creating an interesting and flattering composition.
4. Editing: Post-processing is an important part of portrait photography, and can help to bring out the best in the photos. Colour correction, retouching, and other techniques can be used to create stunning images.
5. People Skills: Working with people can be a challenge, especially when trying to get them to pose in a certain way. Having good people skills can help to make the process easier and more enjoyable for both the photographer and the subject.
6. Wedding Photography Tutorials:
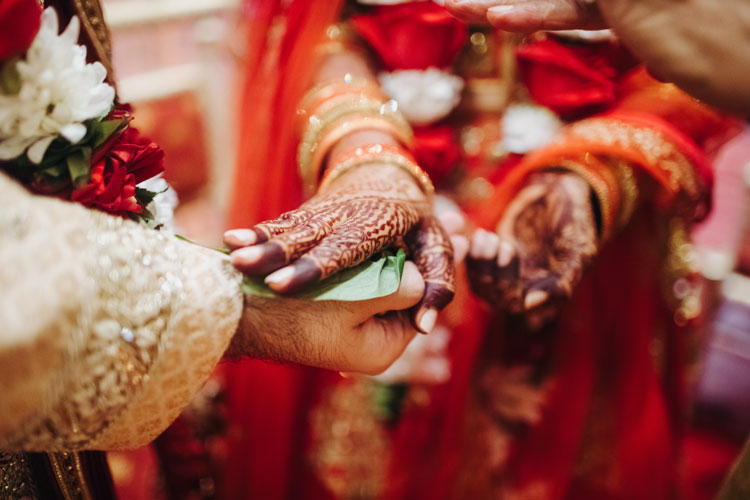
Tutorials and resources that teach how to capture beautiful wedding photos with the right technique and equipment.
1. Pre-Wedding Photography: Pre-wedding photography is the perfect way to get to know your clients before the big day. It gives you the opportunity to build a rapport with them and to understand what kind of atmosphere and style they’re looking for. There are some key elements to consider when shooting pre-wedding photos, such as the location, the poses, the lighting and the composition.
2. Wedding Day Photography: On the wedding day, you’ll want to capture all the special moments that make the day so special. It’s important to be organised and to plan ahead of time to get the most out of the day. You should consider the lighting, the poses and the composition when capturing the perfect wedding day photos.
3. Post-Wedding Photography: Post-wedding photography is all about capturing memories after the wedding day is over. This includes the honeymoon, the reception and any other special occasions. As with pre-wedding and wedding-day photography, you’ll want to consider the lighting, the poses and the composition for the best results.
4. Editing and Retouching: Once you’ve taken the photos, it’s time to get editing. This involves using photo editing software to enhance the photos and make them look their best. This includes adjusting the colour, contrast and sharpness, as well as removing blemishes, unwanted objects and other imperfections.
5. Photobooks and Albums: Photobooks and albums are a great way to display your wedding photos. You can create a customised album or photobook that can be shared with family and friends. You can also create a digital version of your album to share online or print out at home.
7. Sports Photography Tutorials:
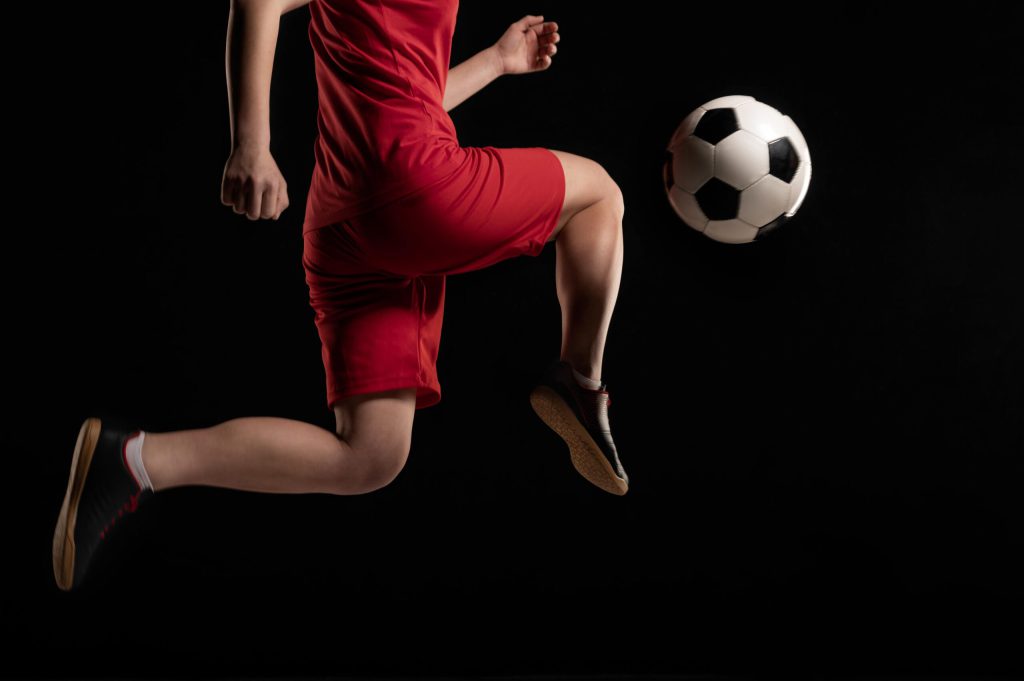
Tutorials and resources that teach how to capture action shots of sports and other activities.
1. Setting Up Your Camera Equipment: Before you can start taking photos, you need to make sure that your camera is properly set up. Start by reading your camera’s manual to familiarize yourself with all the settings and features. It’s also important to make sure you have the right equipment for the job. For sports photography, you’ll need a high-quality camera body, a fast lens, and a sturdy tripod.
2. Choosing the Right Shutter Speed: Shutter speed is one of the most important settings when it comes to sports photography. A fast shutter speed (1/1000th of a second or faster) will help you freeze the action, while a slower shutter speed (1/60th of a second or slower) can be used to create motion blur. Experiment with different shutter speeds to get the look you’re after.
3. Choosing the Right Aperture: Aperture plays an important role in sports photography, as well. A wide aperture (f/2.8 or wider) will help you blur the background and isolate the subject, while a narrow aperture (f/8 or narrower) will help you get a sharp image with a wide depth of field. Experiment with different apertures to get the look you’re after.
4. Knowing When to Use Flash: Flash can be a great tool for sports photography, but it is important to use it sparingly. It can be used to fill in shadows and help freeze the action, but it can also be distracting. If you are shooting in the evening or indoors, it is usually best to use a flash.
5. Finding the Right Angle: The angle of the shot is crucial in sports photography. You want to find an angle that will show the action and give the viewer a sense of the action. Experiment with different angles and try to get close to the action.
6. Editing and Post-Processing: Editing and post-processing are essential for sports photography. You can use editing software such as Adobe Lightroom to edit your photos and give them a professional look. You can also use post-processing techniques such as cropping, sharpening, and colour correction to improve the overall look of your photos.
8. Macro Photography Tutorials:
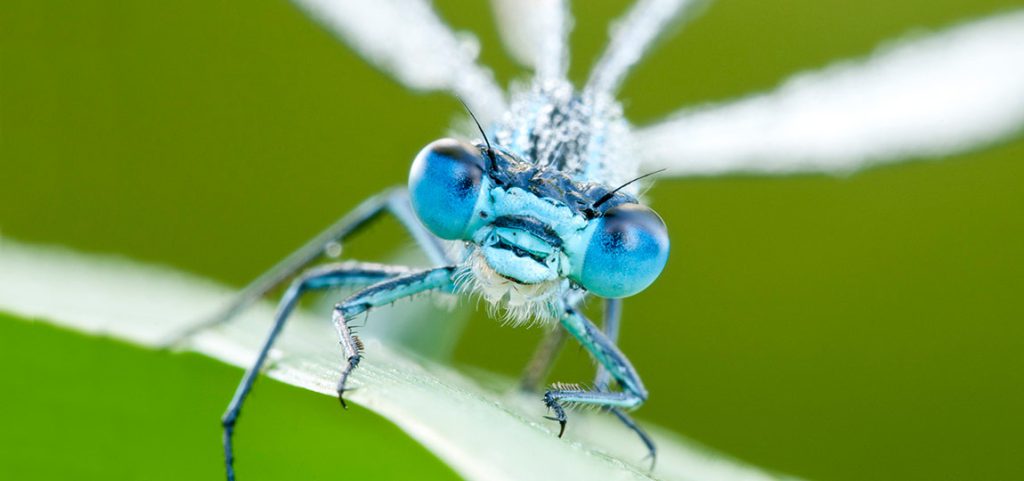
Tutorials and resources that teach how to capture close-up shots of small objects with special macro lenses and other equipment.
1. Choose the Right Camera: The first step in macro photography is choosing the right camera. For macro photography, you will want to choose a camera with a large sensor and a good macro lens. Most digital SLR cameras come with a macro lens, but if you don’t have one then you should purchase one. Macro lenses allow you to get close to your subject and capture intricate details.
2. Set Up Your Equipment: Once you have chosen the right camera and lens, you will need to set up your equipment. This includes setting up the tripod or other support for your camera and making sure your lens is properly mounted. You will also want to make sure your camera is set to the correct settings for macro photography. This includes setting the ISO, aperture, and shutter speed.
3. Focus and Compose: When you are ready to take a macro photograph, the first thing you need to do is focus and compose. This is done by using the camera’s autofocus and adjusting the settings until the subject is in focus. Then, you will need to compose the image so that your subject is the main focus of the photograph.
4. Lighting: Lighting is an important factor in macro photography. You will want to make sure that your subject is properly lit. Natural lighting is best for macro photography, but you may need to use artificial lighting if natural light is not available. You should also pay attention to shadows when taking macro photographs.
5. Post-Processing: Once you have taken your macro photograph, you will need to do some post-processing. This includes editing the image in a photo editing program, such as Adobe Photoshop. This will allow you to enhance the colours, sharpen the details, and make any other adjustments needed to make the photograph look its best.
9. Night Photography Tutorials:
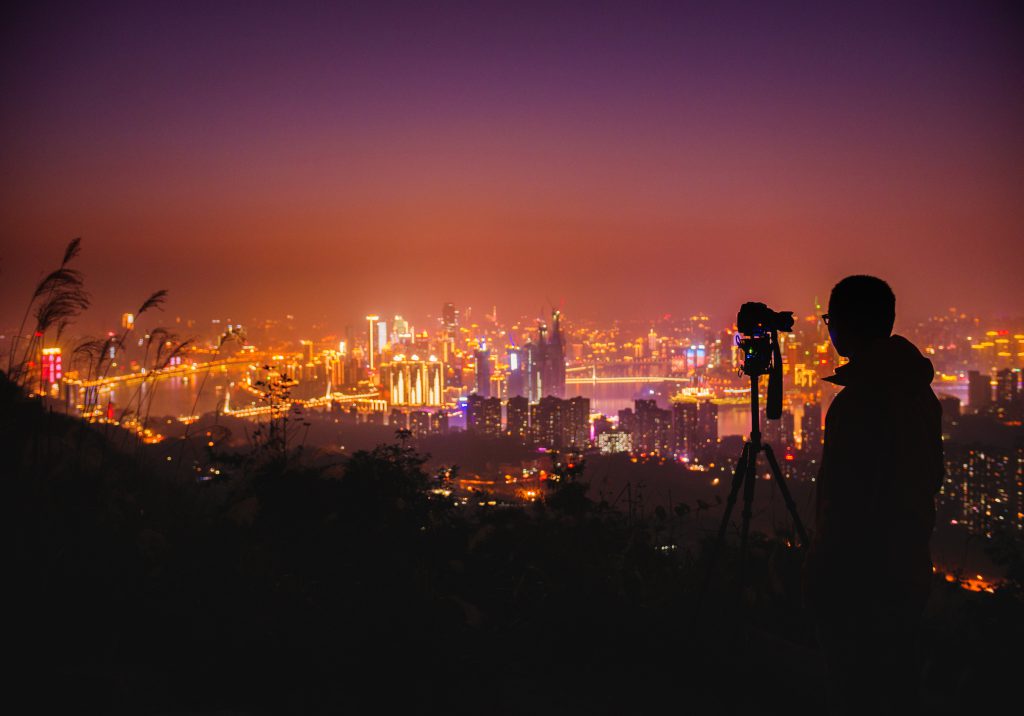
Tutorials and resources that teach how to capture stunning night shots with the right camera settings and techniques.
1. Get to Know Your Camera Settings: Before you even start shooting, take the time to get familiar with your camera and its settings. Read the manual and experiment with different modes and settings to understand what you have available.
2. Shoot in Manual Mode: Shooting in manual mode will give you the most control over your exposure. This means you can adjust the shutter speed, aperture, and ISO to get the perfect exposure.
3. Use a Tripod: Handholding your camera will lead to camera shakes and blurry images. To avoid this, use a tripod to keep your camera steady.
4. Increase Your ISO: To capture the night sky and stars, you’ll need to increase your ISO. This will make the stars brighter and your image easier to edit.
5. Use Long Exposures: Long exposures will allow you to capture more light, making the stars and night sky brighter. Use a remote shutter release and a shutter speed of at least 30 seconds.
6. Use a Wide-Angle Lens: Wide-angle lenses are great for capturing the night sky. They will allow you to capture more of the sky and stars in your frame.
7. Use a High-Quality Lens: Investing in a high-quality lens will make a big difference in your photos. A good lens will help you capture more light and detail in your photos.
8. Focus on Infinity: To ensure your stars are in focus, set your focus to infinity. This will make sure your stars are sharp and clear.
9. Use Light Paintings: Light painting is a great way to add creativity and interest to your night photos. Use a flashlight or sparkler to add light to your photos.
10. Use Filters: Neutral density (ND) filters are great for creating longer exposures and capturing star trails. They also help reduce light pollution.
10. Street Photography Tutorials:
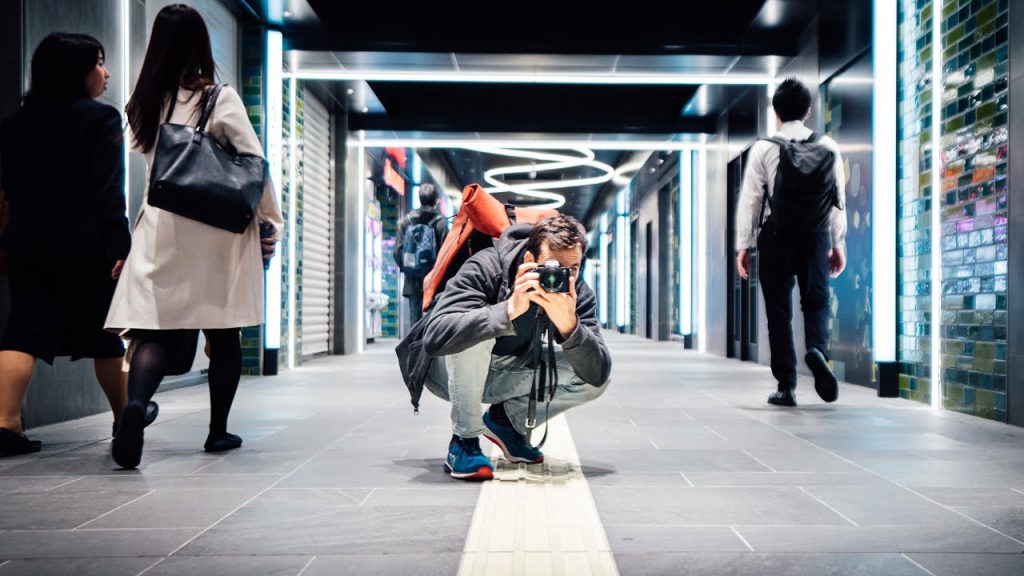
Tutorials and resources that teach how to capture candid photos of everyday life in urban settings.
1. Understand Your Camera Settings: Before attempting street photography, it is important to understand the settings and functions of your camera. Read the user manual and experiment with different settings to understand how they will affect the images you take.
2. Choose the Right Lens: Different lenses can vastly change the look and feel of your street photography. Choose a wide-angle lens if you want to capture more of the scene, or a telephoto lens if you want to capture more detail.
3. Get Close: Street photography is often about capturing moments and emotions. To really capture the essence of the street, you need to get close to your subject. Don’t be afraid to get in close!
4. Anticipate the Moment: Street photography is about capturing the moment before it happens. Look for signs of motion, such as a person walking, or a vehicle beginning to move. Practice anticipating the moment and capturing it before it passes.
5. Use Natural Light: Natural light can give your street photography a unique look and feel. Try shooting at different times of the day to experiment with the different types of light available.
6. Shoot in Manual Mode: Manual mode allows you to control the exposure settings of your camera. This will allow you to capture the exact look and feel you are after in your street photography.
7. Take Your Time: Street photography is all about capturing the moment. Don’t rush things. Take your time to observe the scene and wait for the moment to unfold.
8. Capture People’s Emotions: Street photography is not just about capturing images of people, but also capturing their emotions. Look for signs of emotion in people’s faces and capture them in your images.
9. Be Discreet: Respect the privacy of the people you are photographing. Don’t be intrusive or make people feel uncomfortable. Be discreet and respect their privacy.
10. Have Fun: Street photography should be fun. Enjoy the process of photographing the streets and don’t be afraid to experiment with different techniques and styles.
You may also like:
- Amazing 10 Different Types Of Photography
- Top 10 Reviews of the latest photography equipment
- 20 Killer Photography Tips with a Phone
- Top 5 Cameras For Photography
- 14 Photography Tips For Beginners