Photography is an art form that takes practice and dedication to master. To take stunning photographs, one must learn the art of composition. The composition uses elements such as the rule of thirds, leading lines, depth of field, and foreground and background to create a balanced and visually appealing image. Here are 10 tips for taking stunning photographs by mastering the art of composition.
1. The rule of thirds
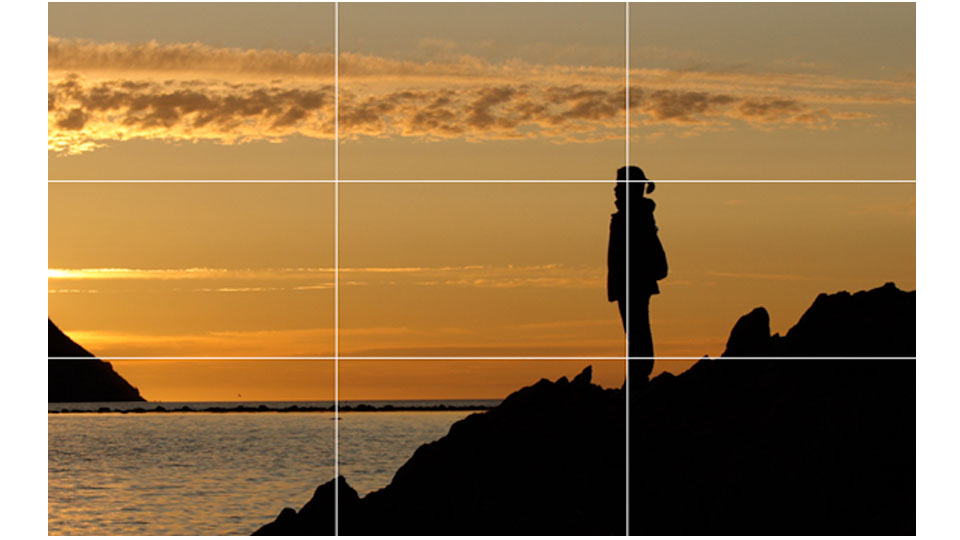
- Understand the concept: The rule of thirds states that an image is more balanced and pleasing to the eye when its subjects or elements are placed along imaginary lines that divide the image into thirds, both horizontally and vertically.
- Place subjects on intersecting points: Place the main subject or key elements of the image along the intersecting points where the third lines meet.
- Use the lines to align elements: Use the thirds line as a guide to align other elements in the scene, such as horizons, buildings, or trees.
- Experiment with placement: Don’t feel limited to strictly adhering to the rule of thirds; sometimes breaking the rule can lead to more interesting compositions.
- Pay attention to the background: The background of an image can also be balanced using the rule of thirds, by placing elements along the thirds lines.
- Consider the orientation: The rule of thirds works for both landscape and portrait orientations, so consider which orientation will best suit your scene.
- Use it for portraits: The rule of thirds can also be applied to portrait photography by placing the subject’s eyes along the top third line.
- Create diagonal lines: Use the thirds line to create diagonal lines in the scene for added interest and movement.
- Utilize leading lines: Incorporate leading lines, such as roads, rivers, or fences, into your composition to guide the viewer’s eye and reinforce the rule of thirds.
- Practice, practice, practice: The more you practice using the rule of thirds, the more natural and instinctive it will become.
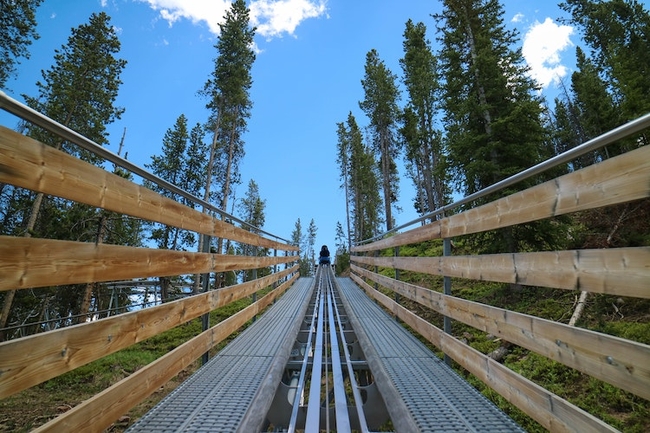
2. Leading lines
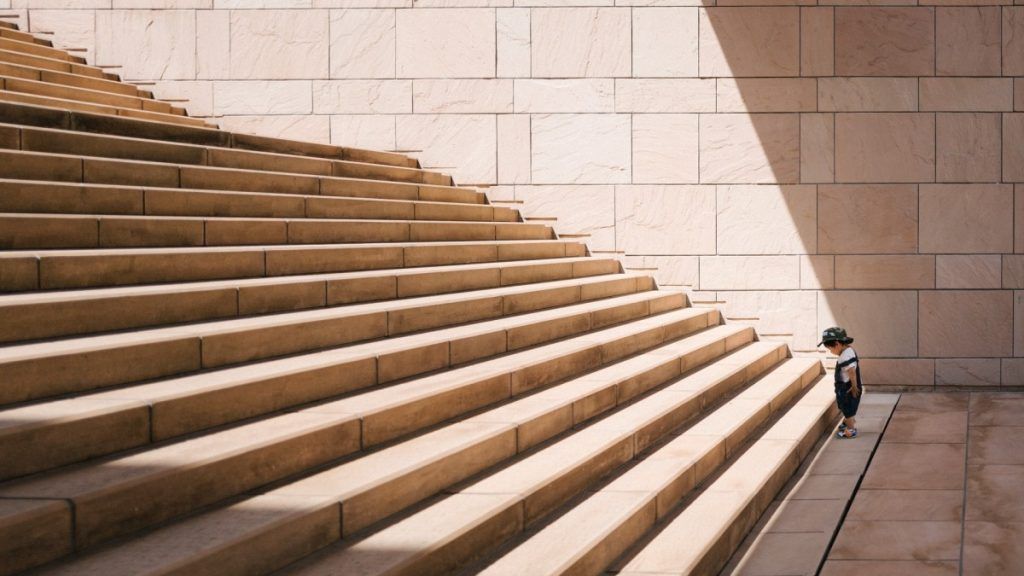
- Identify leading lines: Look for lines in the scene that can guide the viewer’s eye, such as roads, bridges, pathways, or even shadows.
- Use lines to create depth: Leading lines can help add depth and perspective to an image, drawing the viewer into the scene.
- Place lines strategically: Position leading lines in a way that takes the viewer on a journey through the image, from the foreground to the background.
- Combine lines with the rule of thirds: Use leading lines in combination with the rule of thirds to create balanced and compelling compositions.
- Experiment with line width: Vary the width of the lines to add interest and emphasis to different parts of the scene.
- Use lines to isolate subjects: Leading lines can also be used to isolate a subject and draw attention to it, such as a lone tree in a field or a person walking down a path.
- Use lines to create patterns: Look for repeating lines, such as railway tracks or rows of trees, to create patterns and add rhythm to the image.
- Pay attention to line direction: Consider the direction of the lines and how it affects the overall mood and feel of the image.
- Use lines to lead the eye: Use leading lines to lead the viewer’s eye to the main subject or a point of interest in the scene.
- Practice finding leading lines: The more you practice recognizing and incorporating leading lines into your compositions, the better you will become at using them to create stunning images.
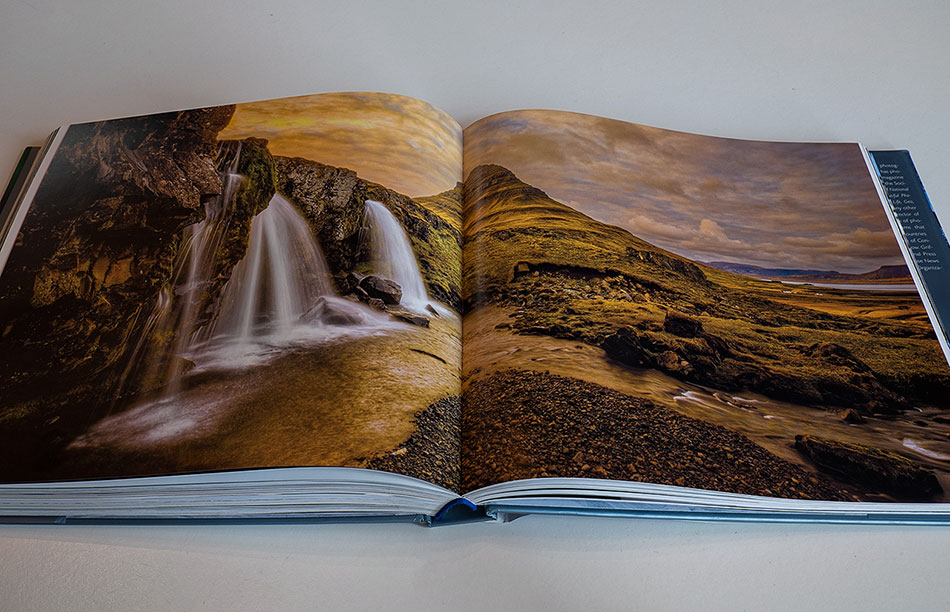
3. Framing

- Find natural frames: Look for natural frames in the scene, such as doorways, windows, or arches, to frame the main subject.
- Use foreground elements: Incorporate foreground elements, such as trees or rocks, into the composition to create a frame around the main subject.
- Experiment with different frame shapes: Vary the shape of the frame, such as circular or diagonal, to add interest and emphasis to the subject.
- Balance the frame and subject: Make sure the subject is balanced within the frame and does not get lost in the surrounding elements.
- Pay attention to the background: Consider the background behind the subject and make sure it does not detract from the overall composition.
- Use frames to create depth: Use frames within the scene to create depth and draw the viewer’s eye into the image.
- Consider the orientation: The orientation of the frame can greatly impact the feel of the image, so experiment with different orientations.
- Use frames to tell a story: Use frames to tell a story or convey a mood, such as framing a subject with a dramatic sky to convey a sense of awe.
- Combine frames with other techniques: Combine framing with other techniques, such as leading lines or the rule of thirds, to create even more impactful compositions.
- Practice using different frames: The more you practice using different types of frames, the better you will become at incorporating them into your compositions to create stunning images.
4. Balancing elements

- Consider the visual weight of elements: Pay attention to the size and placement of different elements in the scene, as well as their visual weight, to create balance.
- Balance elements in both the foreground and background: Make sure to balance elements not just in the foreground, but also in the background, to create a harmonious image.
- Use symmetry and patterns: Incorporate symmetry and patterns into the composition to create a sense of balance and order.
- Experiment with asymmetrical balance: Don’t be afraid to experiment with asymmetrical balance, where elements of unequal weight are placed in such a way that they still create balance.
- Balance colour: Use colour to balance the image, such as using complementary colours or a monochromatic palette.
- Balance light and dark: Pay attention to the balance of light and dark in the image and make sure it does not detract from the overall composition.
- Use negative space: Use negative space, or empty space, to balance the subject and create a sense of calm.
- Balance the subject and environment: Make sure the subject and environment are balanced, such as placing a subject in the centre of a spacious landscape.
- Combine balancing with other techniques: Combine balancing elements with other techniques, such as the rule of thirds or framing, to create even more impactful compositions.
- Practice balancing elements: The more you practice balancing elements in your compositions, the better you will become at creating harmonious and stunning images.
5. Symmetry and patterns
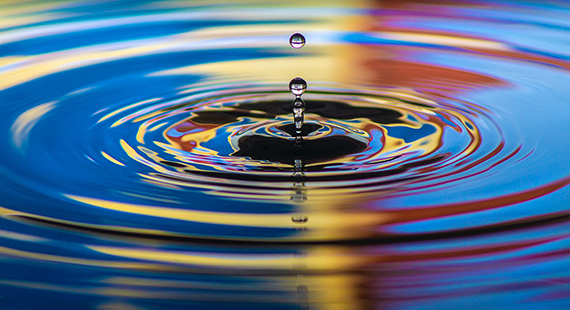
- Look for symmetrical subjects: Look for subjects in the scene that have a natural symmetry, such as reflections, buildings, or natural formations.
- Use reflections: Use reflections in water or mirrors to create symmetrical compositions.
- Experiment with breaking symmetry: Don’t be afraid to break symmetry and add an element of interest to the image, such as a person walking down a symmetrical path.
- Find patterns in nature: Look for patterns in nature, such as ripples in water, clouds, or repeating textures.
- Use repeating shapes: Incorporate repeating shapes, such as circles or triangles, into the composition to create patterns and add visual interest.
- Balance patterns and negative space: Make sure to balance patterns with negative space, such as incorporating empty areas between repeating elements.
- Experiment with pattern orientation: Vary the orientation of the patterns to create different moods and emotions.
- Use patterns to create rhythm: Use patterns to create rhythm and movement in the image.
- Combine patterns with other techniques: Combine patterns with other techniques, such as the rule of thirds or framing, to create even more impactful compositions.
- Practice finding patterns: The more you practice recognizing and incorporating patterns into your compositions, the better you will become at using them to create stunning images.
6. Negative space
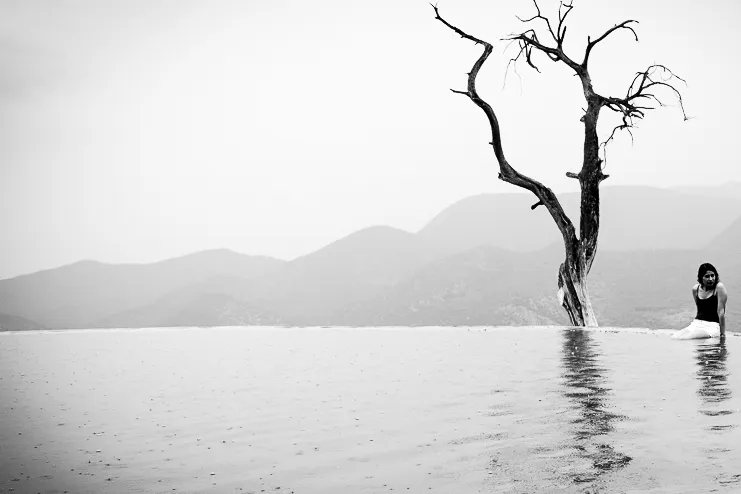
- Look for opportunities to use negative space: Look for opportunities to use negative space, such as open skies, empty landscapes, or simple still lifes.
- Use negative space to emphasize the subject: Use negative space to emphasize the main subject by surrounding it with empty space.
- Balance negative space with the subject: Make sure to balance the subject and negative space, so that neither one overwhelms the other.
- Use negative space to create simplicity: Use negative space to create simple, uncluttered compositions that allow the subject to stand out.
- Experiment with different types of negative space: Vary the type of negative space, such as using a solid colour or textured background.
- Use negative space to create a sense of depth: Use negative space to create a sense of depth and lead the viewer’s eye into the image.
- Use negative space to create a mood: Use negative space to create a mood, such as using a dark negative space to convey a sense of mystery.
- Combine negative space with other techniques: Combine negative space with other techniques, such as the rule of thirds or framing, to create even more impactful compositions.
- Practice using negative space: The more you practice using negative space in your compositions, the better you will become at incorporating it to create stunning images.
- Keep negative space in mind when composing: Always keep negative space in mind when composing your images and consider how it can add to the overall impact of the image.
7. Depth of field

- Use a wide aperture: Use a wide aperture, such as f/1.4 or f/2, to create a shallow depth of field and isolate the subject from the background.
- Use a narrow aperture: Use a narrow aperture, such as f/11 or f/16, to create a deep depth of field and keep both the foreground and background in focus.
- Consider the distance between the subject and background: The closer the subject is to the background, the shallower the depth of field will be.
- Use a longer focal length lens: Use a longer focal length lens, such as a telephoto lens, to create a shallower depth of field.
- Use a shorter focal length lens: Use a shorter focal length lens, such as a wide-angle lens, to create a deeper depth of field.
- Consider the distance between the subject and the camera: The closer the subject is to the camera, the shallower the depth of field will be.
- Use focus stacking: For landscape photography, consider using focus stacking to create a deep depth of field and keep both the foreground and background in focus.
- Experiment with different depths of the field: Don’t be afraid to experiment with different depths of the field and see how it affects the mood and impact of the image.
- Combine depth of field with other techniques: Combine depth of field with other techniques, such as the rule of thirds or framing, to create even more impactful compositions.
- Practice controlling depth of field: The more you practice controlling depth of field, the better you will become at using it to create stunning images.
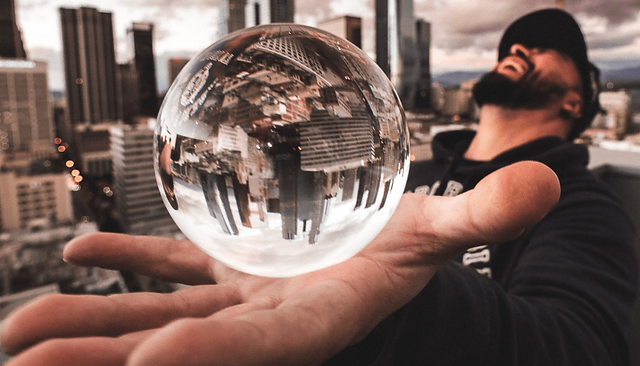
8. Vantage point

- Change your perspective: Change your perspective by getting low to the ground, climbing to a high vantage point, or getting close to the subject.
- Consider the subject: Consider the subject and what you want to emphasize or de-emphasize when choosing your vantage point.
- Experiment with different viewpoints: Don’t be afraid to experiment with different viewpoints and see how it affects the mood and impact of the image.
- Use leading lines: Use leading lines to guide the viewer’s eye through the image and create a sense of depth.
- Use foreground elements: Use foreground elements, such as rocks or flowers, to add depth and interest to the image.
- Use the rule of thirds: Use the rule of thirds to balance the elements in the image and create a harmonious composition.
- Use symmetry: Use symmetry to create balanced, harmonious compositions.
- Use negative space: Use negative space to simplify the composition and allow the subject to stand out.
- Combine vantage point with other techniques: Combine the vantage point with other techniques, such as depth of field or framing, to create even more impactful compositions.
- Practice changing your vantage point: The more you practice changing your vantage point, the better you will become at using it to create stunning images.
9. Lighting
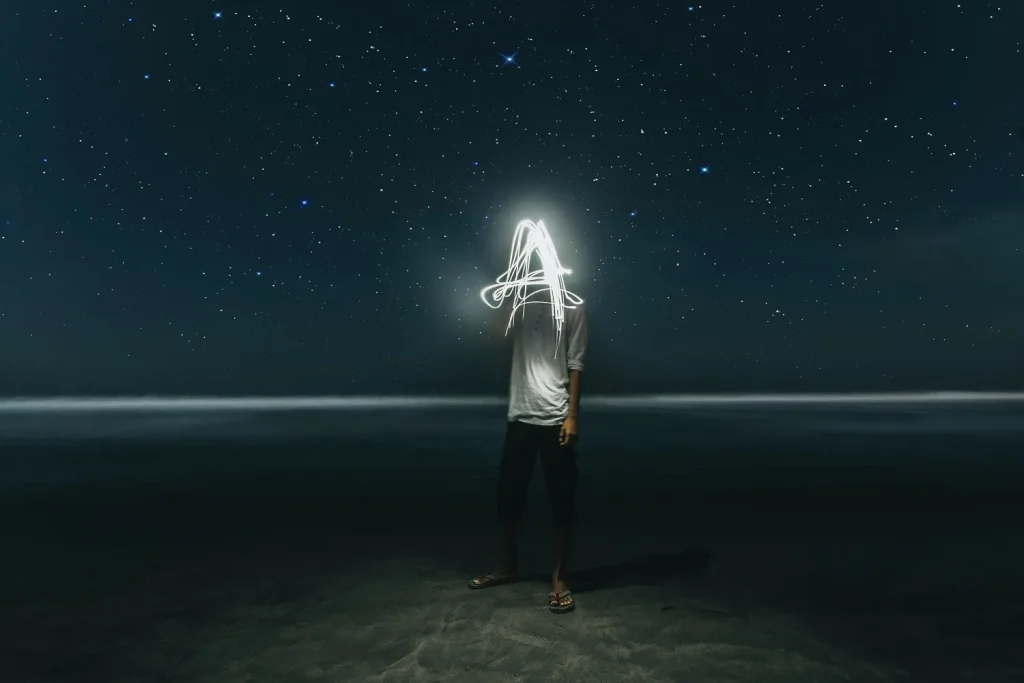
- Use natural light: Take advantage of the beautiful light that nature provides, such as soft light during sunrise or sunset.
- Experiment with different lighting conditions: Don’t be afraid to experiment with different lighting conditions and see how it affects the mood and impact of the image.
- Use backlighting: Use backlighting to create a beautiful halo effect around the subject and add depth to the image.
- Use side lighting: Use side lighting to add dimension and texture to the subject and create interesting shadows.
- Use window light: Use window light as a soft, natural light source to illuminate the subject.
- Use artificial light: Use artificial light, such as flash or studio lighting, to control the lighting conditions and create the desired mood and impact.
- Use light and shadow: Use light and shadow to create depth, texture, and contrast in the image.
- Balance the light: Balance the light in the image so that the highlights and shadows are not too bright or too dark.
- Use light to create mood: Use light to create mood and atmosphere, such as warm light for a romantic mood or cool light for a dramatic mood.
- Practice using light: The more you practice using light, the better you will become at using it to create stunning images
10. Timing
- Timing is everything: Timing is key to capturing the perfect moment and creating stunning images.
- Anticipate the moment: Anticipate the moment by being prepared and ready to take the shot when the moment arrives.
- Pay attention to light: Pay attention to the light and the way it changes throughout the day, and time your shots accordingly.
- Use slow shutter speeds: Use slow shutter speeds to capture movement and create a sense of motion in the image.
- Use fast shutter speeds: Use fast shutter speeds to freeze motion and capture fast-moving subjects with sharp clarity.
- Consider the environment: Consider the environment and the way it affects the light, such as clouds or buildings, and time your shots accordingly.
- Capture the golden hour: Capture the golden hour, the time around sunrise and sunset when the light is soft and warm, for stunning images.
- Use burst mode: Use burst mode to capture a series of images in rapid succession and increase the chances of capturing the perfect moment.
- Plan ahead: Plan ahead and research the location, the subject, and the lighting conditions to maximize the chances of capturing stunning images.
- Practice timing: The more you practice timing, the better you will become at capturing the perfect moment and creating stunning images.
You may also like:
- 10 Simple Tips for Better Landscape Photography
- Top 10 Photography tutorials and resources
- Amazing 10 Different Types Of Photography
- Top 10 Reviews of the latest photography equipment
- Basic 7 Types Of Photography